August 19, 2025
Starting my second Kaggle competition, I noticed the tutorial provided by the competition hosts uses Pytorch to create Long Short Term Memory (LSTM) and Graph Neural Network (GNN) models. Pytorch is an open-source framework that is used to build and train deep learning models. (Alternative frameworks include TensorFlow or Keras). A neural network is basically a huge function that is loosely built on the concept of neurons in a brain. Each layer of neurons passes on information to the next layer of neurons. The neurons in each layer modify the information they receive based on parameters (specifically, weights and biases). Then, the neural network outputs a prediction.
I’ve never programmed a basic neural network, but this quick exercise will give me a better understanding of how they work before trying to apply LSTMs and GNNs to a real world problem. It will also give me more familiarity with the PyTorch framework.
I watched the video But what is a neural network? from 3Blue1Brown to get a more granular understanding of how neural networks work. Then, I watched Pytorch in 100 seconds by Fireship, which explained Pytorch’s uses and gave a very quick explanation of how to build a neural network. Perfect combo!
You can follow along by watching both videos first, or just read through my explanation below. My Colab notebook is HERE.
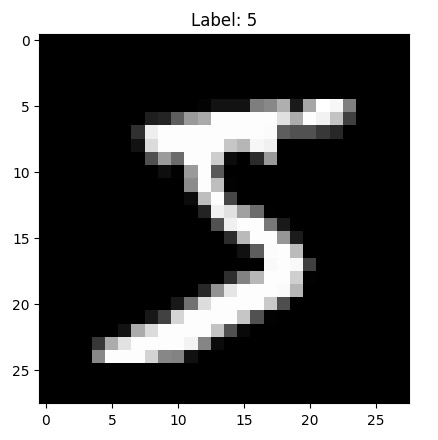
Objective: Create a basic neural network that takes images from the famous MNIST dataset and predicts the handwritten number present in each image.
1. Import the necessary libraries
- ‘DataLoader’ handles batching for efficiency and memory management.
- ‘Datasets’ gives access to built-in datasets like MNIST

2. Explore the dataset
- The tensor is the fundamental data structure in Pytorch. They are analogous to arrays in numpy. Before moving forward with PyTorch commands, convert the given dataset from whatever form it’s currently in into a tensor.
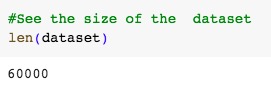
- There are 60,000 samples in the dataset.
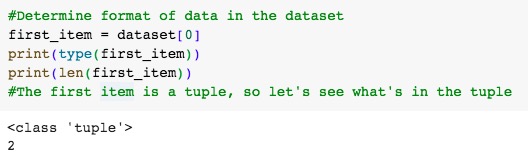
- Determine the format of data in the dataset. 🔍 Using the ‘type()’ command tells me that the first item in the dataset is a tuple. Most Pytorch datasets have data stored in a tuple with the pattern ‘(data, target)’. I see that it’s a tuple of length 2.

🔍 The ‘.shape’ attribute tells me the dimensions of the data. If the data is in the form ‘(data, target)’ and I know I’m looking for image data, I can expect the first value in the tuple to have multiple dimensions. I see that the shape of the first value in the tuple is [1, 28, 28]. PyTorch tensor format represents images as [number of channels, image height in pixels, image width in pixels]. That looks like image data! I originally printed the value of the first tuple, but it was a very, very long tensor, so I only included the shape in the final code.
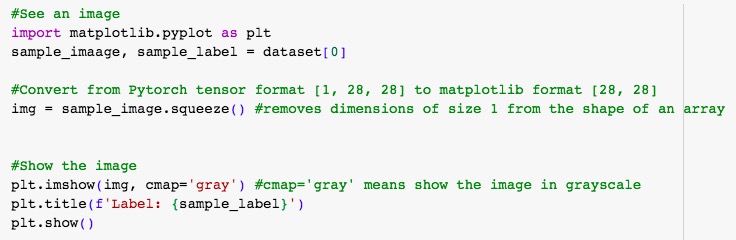
🔍 However, I did print the second tuple value. The target is the handwritten number represented by the image.

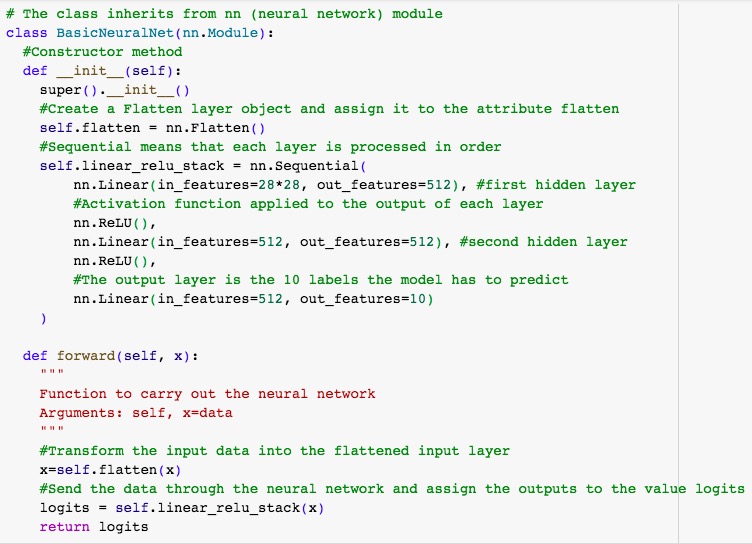
3. Create the neural network class
- The constructor (‘init’) sets up the network’s architecture. This means instead of creating the class like a blank slate, I initialize specific properties of the nn module.
- Instantiate a flatten layer to convert multidimensional image data into a 1D array. I will use the ‘self.flatten’ attribute to create the input layer.
-
Create a ‘Sequential’ object and assign it to the attribute ‘linear_relu_stack’. The ‘Sequential’ object consists of the layers of the neural network.
🔍 The first layer is a hidden linear layer (I haven’t forgotten the input layer - I will come back to that in a few code lines). A linear layer is a layer that performs a linear transformation on the data it receives. As discussed in 3Blue1Brown’s video, this means multiplying the input by a weight and adding a bias. The second linear layer is also a hidden layer, and the third linear layer is an output layer, which is why its ‘out_features’ value is 10. Recall that this neural network aims to predict one out of 10 possible digits.
🔧 The ‘in_features’ parameter is the size of the input sample. The input data is an image that is 2828 pixels, so I must need 2828 neurons in the input layer.
🔧 The ‘out_features’ parameter is the number of neurons in the next layer. It’s common to use numbers that are powers of 2 for hidden layers for computational efficiency and memory. 512 is a common starting point, as 2^9=512.
🔧 ReLU, which stands for Rectified Linear Unit, is not a layer itself. It is an activation function applied to the output of each layer. It allows the neural network to model non-linear relationships in the data.
🔍 Create the forward method to carry out the neural network processes.
🔧 Use PyTorch’s ‘transform’ method to transform the input data into the flattened input layer.
🔧 Send the data through the neural network and assign the value to the variable logits. Logits are the name for the model’s raw “confidence score” for a specific output. A higher logit number represents a higher confidence by the model that the output belongs to a certain class. So, if the first logit score is the highest, the model is most confident that the digit in the image is a 0.
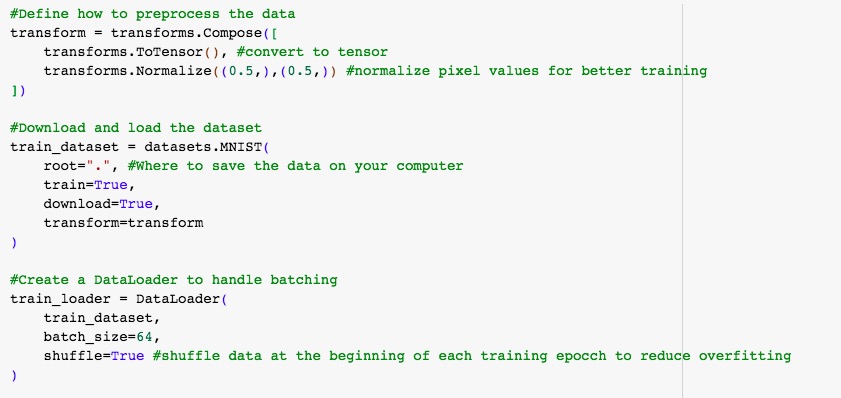
4. Create the preprocessing and loading pipeline
-
Transform the data, as I discussed in the explore the data section.
🔍 I also normalize pixel values. Since this is image data, the value of each pixel is somewhere between 0-255. I want to scale those values so that instead of being between 0 and 255, they’re between 0-1.
-
I loaded the dataset in almost the same way as I did in the “explore the data” section. However, since I transformed the data differently than I did in the prior section, I ran this command again with the updated transform instructions.
-
Recall that there are 60,000 images in this dataset. Instead of trying to send them all through the neural network at once, I should batch them using ‘DataLoader’ and send them to the neural network in groups of a manageable size.
🔍 Additionally, the neural network is trained and updated upon each run. So the neural network will predict labels for 64 images, compare the predictions to the true target labels, measure the difference between the prediction and the true label, and then average the differences between prediction and targets for all 64 data points in that batch. With that information, the neural network can update its weights to produce better predictions for the next batch.
🔍 Outputs are a batch of 64 images in the same format - ‘(data, target)’.
5. Run the neural network
- The strength of a GPU over a CPU is its ability to carry out parallel processing. They are useful for processing large datasets more efficiently than CPUs. If you’re using Google Colab like me, the default processor is a CPU. But you can click the dropdown next to Runtime in the top right, then click “Change runtime type” to change the Runtime to “T4 GPU”.
-
Create a for loop to:
🔍 Separate the data from the labels for each data point in the batch.
🔍 Run the neural network and assign the output to the variable output.
🔍 Print the input shape and the output shape.
🔧 After using DataLoader and adding batches of size 64, PyTorch adds another dimension to the tensor. So the input shape is [batch_size, channels, image height in pixels, image width in pixels]. That’s why the input shape is now [64, 1, 28, 28].
🔧 The output shape is [batch_size, number_of_output_neurons].
🔍 Earlier, I mentioned how logits represent the model’s confidence in a particular output value. The softmax equation transforms logit values to actual probabilities.
🔍 I would recommend putting a break statement after the last print statement the first time you run the code to make sure it runs smoothly before trying to run all 60000 samples.
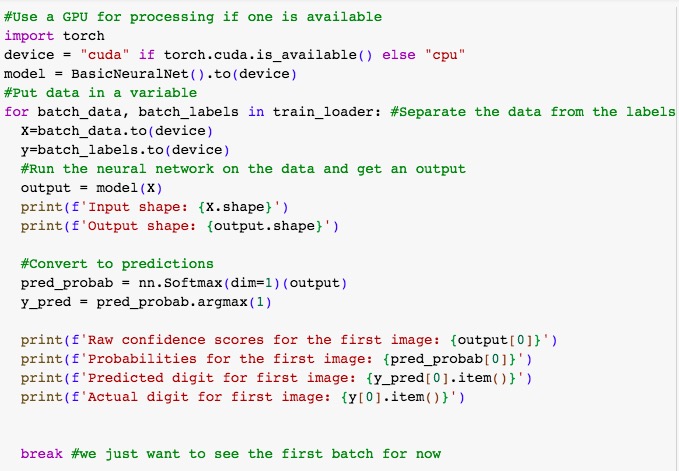
After running the code block, look at the “Predicted digit for first image” vs “Actual digit for first image”. Are they congruent? Mine aren’t. The model needs to be trained. This means that it needs to compare its predictions to the targets. Then it needs to optimize its parameters to get the smallest difference possible between its predictions and the targets. Building the most basic version of the model itself was a great first step! In my next post, I’ll talk about adding code to allow the model to actually train and learn.